Category: Best Offerings

  • What Is Sound Engineering? A Guide for Beginners

    What Is Sound Engineering? A Guide for Beginners

    Every song you have ever loved — every perfectly balanced vocal, every punchy kick drum, every reverb tail that fades beautifully into silence — is the result of sound engineering. Behind every great recording stands a sound engineer who understood how to capture, shape, balance, and master audio with precision and artistry. Yet for most aspiring music creators, sound engineering remains one of the most misunderstood, underestimated, and underappreciated skills in the entire music production chain.

    In 2026, sound engineering is no longer a separate discipline reserved for professionals in expensive recording studios. The democratization of music technology has placed professional-grade recording, mixing, and mastering tools in the hands of independent artists worldwide — meaning that today’s bedroom producer is also today’s recording engineer, mix engineer, and mastering engineer, all at once. As one industry educator put it: the days of “the producer makes the music, then sends it to the engineer” are largely over, especially in independent music. Sound engineering skills are no longer optional extras. They are core competencies for any serious independent artist.

    This complete beginner’s guide covers everything you need to understand about sound engineering — what it actually is, how it differs from music production, the core disciplines it encompasses, the essential tools and concepts you need to learn, the career paths available in 2026, how AI is changing the field, and how the sound engineering journey connects to releasing your music globally through A3 Tunes. Whether you are an aspiring professional sound engineer or an independent artist who wants to take control of your own recording and mixing, this guide will give you a clear, honest foundation to build on.


    What Is Sound Engineering? The Complete Definition

    Sound engineering is the technical and creative practice of capturing, manipulating, processing, and reproducing audio to achieve a desired sonic result. It encompasses everything that happens to sound from the moment it enters a microphone to the moment a listener hears the finished recording on their headphones, speakers, or streaming platform.

    Sound Engineering vs Music Production — Understanding the Difference

    These two terms are often used interchangeably, but they describe distinct roles. Music production is the broader creative process of developing a song or album — writing, arranging, selecting sounds, shaping the artistic direction, and guiding the creative vision. Sound engineering is specifically focused on the technical audio processes — recording, mixing, signal processing, and mastering — that transform raw recorded material into polished, professional audio.

    In traditional professional studios, these were separate roles. A music producer guided the artistic direction while a sound engineer handled the technical execution. Today, in the independent music economy, one person frequently fills both roles simultaneously. An independent artist who records their own vocals, programs their own beats, mixes their own tracks, and masters for streaming is practicing both music production and sound engineering — whether they use those labels or not.

    The Three Core Pillars of Sound Engineering

    Every sound engineering workflow, regardless of genre or context, is built on three foundational pillars. Recording is the process of capturing audio — using microphones, direct inputs, and signal chains to convert acoustic energy into digital audio data. Mixing is the process of combining, balancing, and processing individual recorded tracks — using EQ, compression, reverb, delay, and dozens of other tools — into a cohesive, well-balanced stereo or spatial audio output. Mastering is the final stage of audio processing, optimizing the mixed stereo file for distribution across all playback systems and streaming platforms.

    Each pillar requires distinct skills, tools, and knowledge. Most beginners underestimate the depth of expertise each one contains.

    Why Sound Engineering Matters for Independent Artists

    With over 120,000 tracks uploaded to streaming platforms every single day, the quality gap between well-engineered music and poorly-engineered music has never been more consequential. Listeners make split-second decisions — often within the first five seconds of a track — about whether music sounds professional enough to continue listening. Poor recording quality, unbalanced mixes, and poorly mastered audio signal amateurism instantly, regardless of how strong the songwriting or performance underneath actually is.

    Sound engineering is the bridge between your creative vision and the listener’s experience. Get it right and your music sounds as good as any professional release. Get it wrong and even the best song in the world sounds like a rough demo.


    The Core Disciplines of Sound Engineering

    Sound engineering is not a single skill but a family of related disciplines. Understanding each one gives beginners a clearer picture of where to focus their learning.

    Recording Engineering — Capturing Sound Properly

    Recording engineering is the art and science of capturing audio cleanly, accurately, and with the sonic characteristics that serve the final mix. A recording engineer makes decisions about microphone selection and placement, signal chain design, gain staging, room acoustics, and session management that fundamentally shape the quality of everything that follows.

    The most important truth about recording is that problems captured at this stage are extremely difficult to fix later. A badly recorded vocal — with room noise, distortion, or poor microphone placement — will sound bad no matter how skillful the subsequent mixing. Good sound engineering begins at the recording stage, not the mixing stage.

    Key skills in recording engineering include understanding microphone types and polar patterns, signal chain management from microphone through preamp to interface, gain staging and headroom management, acoustic treatment and room sound management, and session organization and file management.

    Mixing Engineering — Balancing and Shaping Sound

    Mixing is where the creative and technical aspects of sound engineering converge most dramatically. A mix engineer takes individual recorded tracks — drums, bass, guitars, vocals, synths, samples — and uses EQ, compression, reverb, delay, saturation, stereo imaging, and dozens of other processes to create a final stereo mix where every element is audible, balanced, and emotionally effective.

    Great mixing is invisible. When a mix is done well, the listener experiences the music — not the technical craftsmanship behind it. They feel the emotion of the vocal without consciously noticing the subtle compression that keeps it sitting perfectly in the mix. They experience the power of the drums without hearing the multiband compression and parallel processing that creates that power.

    Key skills in mixing engineering include equalization theory and practice, dynamics processing (compression, limiting, gating), time-based effects (reverb, delay, chorus, modulation), stereo imaging and panning, automation, gain staging through the mix chain, and reference monitoring and critical listening.

    Mastering Engineering — Preparing Music for Distribution

    Mastering is the final stage of audio production — the bridge between the finished mix and the distributed product. A mastering engineer takes the stereo mix and applies global processing to maximize clarity, loudness, and consistency across all playback systems, while also preparing the audio for streaming platforms, vinyl cutting, CD pressing, or any other distribution format.

    Streaming platforms in 2026 have specific loudness standards — Spotify normalizes audio to approximately -14 LUFS, Apple Music to -16 LUFS. Properly mastered audio sounds competitive and consistent on every platform and every playback system, from earbuds to club speakers. Poorly mastered audio sounds quiet, dull, or harshly loud depending on the platform and context.

    Key skills in mastering include broadband and multiband EQ, stereo widening and mid-side processing, transparent limiting and loudness maximization, format-specific delivery (streaming, vinyl, CD), and critical listening on multiple reference systems.

    Live Sound Engineering — The Concert and Event World

    Beyond the recording studio, live sound engineering is a distinct discipline covering the capture, processing, and reproduction of audio during live performances — concerts, festivals, corporate events, theatre productions, and broadcast. A live sound engineer manages front-of-house mixing (what the audience hears through the main speakers) and monitor mixing (what performers hear through stage monitors or in-ear monitors).

    Live sound engineering requires all the same core audio knowledge as studio engineering but adds the complexity of real-time decision-making, unpredictable room acoustics, feedback management, and performance under pressure. Many sound engineers work across both studio and live contexts throughout their careers.


    Essential Sound Engineering Concepts Every Beginner Must Learn

    Before touching any equipment or software, understanding the fundamental concepts of audio is the most important investment you can make as a beginner sound engineer.

    Understanding Sound — Frequency, Amplitude, and the Decibel

    Sound is the physical propagation of pressure waves through air. Every sound has two primary characteristics — frequency (how fast the pressure waves oscillate, measured in Hertz and perceived as pitch) and amplitude (how large the pressure wave is, measured in decibels and perceived as loudness).

    The human hearing range spans approximately 20 Hz to 20,000 Hz (20 kHz). Sound engineers think in frequency ranges — sub-bass (20-60 Hz), bass (60-250 Hz), low-midrange (250-500 Hz), midrange (500 Hz-2 kHz), upper midrange (2-4 kHz), presence (4-8 kHz), and air (8-20 kHz). Understanding which frequency ranges each instrument occupies, and how they interact, is foundational to every mixing decision.

    The decibel (dB) is the unit of measurement for audio levels. Understanding dB scales — dBFS (digital full scale), dBu (professional analog), dBSPL (acoustic sound pressure level) — and how they relate to each other is essential for gain staging, monitoring levels, and delivering correctly-leveled audio to streaming platforms.

    The Signal Chain — How Audio Flows Through a System

    The signal chain describes the path audio takes from its source to its destination — from acoustic sound through microphone, through preamp, through audio interface, into the DAW, through plugins and processing, through monitoring, and finally to the listener. Understanding every link in this chain — and how each one affects audio quality — is one of the most important skills a sound engineer develops.

    Weak links in the signal chain — a poor-quality microphone preamp, a badly-configured interface, or mismanaged gain staging — degrade audio quality in ways that cannot be fully recovered downstream. Professional sound engineers optimize every link in the chain because they understand that audio quality is determined by the weakest link, not the strongest.

    Gain Staging — The Most Overlooked Beginner Skill

    Gain staging is the practice of managing audio levels at each stage of the signal chain to maximize signal quality while avoiding noise and distortion. It is the single most overlooked concept among beginner sound engineers and one of the most consistently important skills among professionals.

    Proper gain staging means setting microphone preamp levels high enough to capture a clean signal above the noise floor, but low enough to avoid clipping or distortion. It means managing levels through the DAW so individual tracks have adequate headroom, buses are not saturating, and the master bus has room to breathe before limiting. A mix with good gain staging sounds open, dynamic, and clean. A mix with poor gain staging sounds compressed, distorted, or noisy even before any deliberate processing is applied.

    EQ — Equalization Fundamentals for Beginners

    Equalization is the process of boosting or cutting specific frequency ranges in an audio signal. EQ is the most commonly used tool in sound engineering and one of the most nuanced to master. Beginners typically learn to use EQ to cut problem frequencies (muddiness, harshness, boxiness) and enhance desirable characteristics (clarity, warmth, presence).

    The two fundamental EQ approaches are corrective EQ — removing problems from audio (cutting mud from a bass guitar, removing harshness from a vocal recording) — and creative EQ — shaping the character of a sound deliberately (adding brightness to a vocal, boosting low-end warmth in a pad). Professional mix engineers use both approaches, often applying corrective EQ first and creative EQ second.

    Compression — Dynamics Control for Better-Sounding Music

    Compression is the process of reducing the dynamic range of an audio signal — making loud parts quieter and, in effect, making quiet parts more present. Used skillfully, compression gives elements of a mix more consistency, punch, presence, and glue. Used badly, it destroys the natural dynamics of a performance and makes audio sound flat and lifeless.

    Key compression parameters include threshold (the level above which compression begins), ratio (how aggressively the compressor reduces levels above the threshold), attack (how quickly the compressor responds to signals crossing the threshold), release (how quickly the compressor stops compressing after the signal drops below the threshold), and make-up gain (volume added after compression to compensate for the overall level reduction).

    Understanding how these parameters interact — and developing the ability to hear compression’s effect — takes months of consistent practice. But it is one of the most transformative skills a sound engineer can develop.

    Reverb and Delay — Time-Based Effects in Sound Engineering

    Reverb and delay are time-based effects that add spatial dimension, depth, and character to recordings. Reverb simulates the natural acoustic reflections of a physical space — a small room, a large hall, a cathedral, a plate reverberator — giving dry, close-recorded audio a sense of space and placement. Delay creates echoes of an audio signal at set time intervals, adding rhythmic interest, width, and depth.

    Used subtly, these effects make a mix feel three-dimensional and cohesive. Used excessively, they make a mix sound washed out and unfocused. Learning to apply reverb and delay with discipline — using them to serve the music rather than to mask problems — is a hallmark of developing mix engineering skill.


    Essential Tools and Equipment for Beginner Sound Engineers

    You do not need a professional studio to begin learning sound engineering. Here is the essential toolkit for starting your journey.

    Digital Audio Workstations (DAWs) — The Heart of Modern Sound Engineering

    A DAW is the software environment where all recording, editing, mixing, and mastering work takes place. The most widely used DAWs in professional sound engineering include Pro Tools (the industry standard in professional recording studios), Logic Pro (Mac-only, exceptional value with professional-grade tools), Ableton Live (dominant in electronic music and live performance contexts), and FL Studio (widely used in hip-hop, trap, and EDM production).

    For beginners on a budget, free and freemium options including BandLab Studio, Cakewalk by BandLab, and Reaper (inexpensive with full professional features) provide genuine capability without significant upfront investment. The choice of DAW matters less than consistency — pick one and commit to learning it deeply before considering a switch.

    Audio Interface — Converting Acoustic Sound to Digital Audio

    An audio interface is the hardware device that connects your microphones and instruments to your computer, converting analog audio signals to digital data (and vice versa). For beginners, the Focusrite Scarlett Solo (one microphone input), Scarlett 2i2 (two inputs), and PreSonus AudioBox USB 96 are excellent entry-level options that deliver professional-quality conversion at affordable prices.

    The audio interface’s preamps — the amplifiers that boost microphone signals to recordable levels — significantly affect recording quality. Even modest-quality interfaces from reputable brands like Focusrite, Universal Audio, SSL, and Audient outperform the built-in audio hardware in most laptops by an enormous margin.

    Microphones — The First Link in the Recording Chain

    Microphones are among the most consequential gear decisions in recording engineering. The three primary microphone types relevant to most beginners are condenser microphones (highly sensitive, excellent for vocals and acoustic instruments, require phantom power), dynamic microphones (more robust, better at handling high sound pressure levels, great for drums and amplifiers), and ribbon microphones (warm, vintage character, fragile and expensive, used for specific applications).

    For home studio recording, a large-diaphragm condenser microphone — such as the Audio-Technica AT2020, Rode NT1, or AKG C214 — is the most versatile starting point for capturing vocals and acoustic sources. Paired with an entry-level audio interface, these microphones deliver professional-quality recordings in treated acoustic environments.

    Studio Headphones and Monitor Speakers — Critical Listening Tools

    Making accurate mixing and mastering decisions requires accurate playback. Studio headphones and monitor speakers are engineered to reproduce audio as flat and uncolored as possible — unlike consumer headphones and speakers that deliberately enhance bass or treble to sound pleasing.

    For beginners, quality studio headphones — such as the Audio-Technica ATH-M50x, Beyerdynamic DT 770 Pro, or Sony MDR-7506 — are more practical and affordable than studio monitors. They allow mixing in any environment without concern for room acoustics. Studio monitors — from brands including Yamaha, Adam Audio, Genelec, KRK, and Focal — offer a more natural listening experience but require acoustic treatment in the room to be accurate.

    Plugins — Software Tools That Power Modern Mixing

    Plugins are software-based audio processors that extend a DAW’s built-in capabilities. Every DAW includes a suite of built-in plugins — EQs, compressors, reverbs, delays — that are sufficient for professional-quality results. Third-party plugins from companies including Waves, Fabfilter, Universal Audio, iZotope, and Plugin Alliance offer additional options with different sonic characters and workflow advantages.

    Beginners should focus on deeply understanding their DAW’s built-in plugins before investing in third-party options. The fundamental skills of EQ, compression, and effects use are transferable across all plugins — the tool matters less than the understanding of what to do with it.


    Step-by-Step Workflow for Beginner Sound Engineers

    Understanding the workflow of a complete engineering session helps beginners understand how the pieces fit together.

    Step 1 — Acoustic Treatment and Studio Setup

    Before recording anything, prepare your recording environment. Soft furnishings absorb sound reflections and reduce room noise. A dedicated recording space — even a treated closet or small room — significantly improves recording quality. Acoustic foam panels, bass traps, and diffusers control problematic reflections that color recordings and make accurate monitoring difficult.

    Many beginners skip acoustic treatment and then wonder why their recordings and mixes sound different on other systems. Room acoustics are one of the most impactful factors in sound quality and one of the most overlooked by beginners.

    Step 2 — Setting Up the Signal Chain and Gain Staging

    Connect your microphone to your audio interface, set preamp gain appropriately (targeting peaks around -18 to -12 dBFS in the DAW), configure your DAW’s sample rate and buffer size, and verify your signal path is working cleanly before recording begins. Check for ground hum, cable noise, and interference before starting a session — these problems are much easier to fix before recording than after.

    Step 3 — Recording With Intention and Multiple Takes

    Record with clear intention about what you are capturing. Use a pop filter for vocal recordings. Record multiple takes for critical performances. Use headphone mixes that allow performers to hear themselves comfortably without leakage into the recording microphone. Label and organize your tracks clearly from the start — session organization is a professional habit that beginners undervalue.

    Step 4 — Editing and Comping — Building the Best Performance

    After recording, edit individual tracks to remove noise, correct timing, and comp (compile) the best performance from multiple takes. Vocal comping — selecting the best phrases and lines from multiple takes to create a composite performance — is one of the most impactful editing processes in modern recording. Even world-class singers comp their vocals.

    Step 5 — Mixing — Building the Sonic Picture

    Begin mixing by setting rough fader levels that create a basic balance without any processing. Then apply corrective EQ to remove problem frequencies, compression to control dynamics, and creative EQ to shape individual characters. Add reverb and delay to create depth and space. Pan elements across the stereo field. Build automation to create movement and dynamic interest throughout the song.

    Compare your mix regularly to professional reference tracks in the same genre — this process (referencing) is one of the fastest ways to identify where your mix is falling short.

    Step 6 — Mastering — Preparing for the World

    After completing the mix, export a high-resolution stereo file (24-bit WAV at 44.1 kHz or higher) and apply mastering processing. Correct any tonal imbalances with gentle broad EQ strokes. Apply transparent compression and limiting to achieve competitive loudness (approximately -14 LUFS integrated for most streaming platforms). Check mono compatibility. Export delivery files in the formats required by your distribution platform.


    AI Tools Transforming Sound Engineering in 2026

    Artificial intelligence has become one of the most significant forces in sound engineering in 2026 — not replacing the engineer but dramatically accelerating workflows and lowering barriers for beginners.

    AI-Powered Mixing Assistants and Intelligent Suggestions

    AI mixing tools like iZotope Neutron, Waves StudioRack, and RoEx Automix analyze your tracks and suggest EQ, compression, and panning decisions based on the sonic content of your audio. They function as a second pair of ears — identifying problems that beginner ears might miss and suggesting solutions that teach as much as they fix. These tools are particularly valuable for beginners who have not yet developed the critical listening skills to identify mixing problems independently.

    AI Mastering — Professional-Grade Results for Beginners

    AI mastering platforms including LANDR, eMastered, and CloudBounce have made professional-quality mastering accessible to independent artists who cannot afford professional mastering engineers. LANDR alone has mastered over five million tracks. These platforms analyze your mix and apply tailored processing to achieve competitive streaming loudness, correct tonal balance, and appropriate stereo width — delivering results in minutes.

    For independent artists releasing music through A3 Tunes, AI mastering provides an affordable path to streaming-ready audio that meets the quality expectations of major platforms. Explore our complete guide on how to make music and release for a full walkthrough of the production-to-distribution workflow.

    Stem Separation — Creative Applications and Remix Culture

    Stem separation tools like LALAL.ai can separate completed mixes into up to ten individual stems — vocals, drums, bass, guitars, synths — with minimal audio artifacts. This enables beginners to study professional mixing decisions by isolating individual elements, create remixes and sample-based productions from existing recordings, and recover stem files from completed mixes for re-mixing.

    Audio-to-MIDI Conversion and Intelligent Editing

    Tools like Basic Pitch convert polyphonic audio recordings to MIDI data directly in the browser, allowing producers to turn recorded performances into editable MIDI that can drive virtual instruments. AI-powered noise reduction tools like iZotope RX can remove background noise, hum, clicks, pops, and room reverb from problem recordings with extraordinary precision — rescuing audio that would previously have been unusable.


    Career Paths in Sound Engineering for 2026

    Sound engineering supports diverse professional pathways — from recording studio work to live event production, broadcast, gaming, film, and beyond.

    Recording Studio Engineer

    Studio engineers work in professional recording facilities, capturing and mixing music for artists across genres. Entry-level studio engineers typically start as studio assistants or runners — learning the environment, equipment, and professional workflows before taking on engineering responsibilities. Mid-level engineers with established client bases in 2026 earn approximately $48,000 to $70,000 annually. Senior engineers and studio owners can earn $70,000 to $100,000 or more.

    Freelance Mixing and Mastering Engineer

    Many sound engineers build successful independent freelance careers offering mixing and mastering services to independent artists, record labels, and content creators. The rise of remote collaboration tools and file-sharing platforms has made it possible to build a global client base from a home studio. Freelance rates range from modest hourly rates for beginners to $50 or more per hour for experienced engineers with strong reputations.

    Live Sound Engineer

    Live sound engineers work concerts, festivals, corporate events, theatre productions, and broadcast, managing audio systems and mixing performances in real time. Front-of-house engineers manage what the audience hears. Monitor engineers manage what performers hear. This career path demands both technical expertise and the ability to make rapid decisions under pressure.

    Post-Production and Broadcast Audio Engineer

    Sound engineering skills translate directly into post-production for film, television, advertising, and podcasting. Dialogue editing, sound design, ADR (automated dialogue replacement), Foley, and mix for picture require specialized skills but are built on the same foundational audio engineering knowledge as music production engineering.

    Gaming and Interactive Audio Engineer

    The gaming industry employs audio engineers specializing in interactive audio design — creating sound effects, music systems, and adaptive audio that responds to player actions. Spatial audio and immersive audio design are particularly in-demand skills in the gaming sector in 2026.


    How to Learn Sound Engineering as a Beginner in 2026

    The path from beginner to proficient sound engineer in 2026 has never had more available resources — formal and informal.

    Formal Education — Degrees and Diplomas

    Many universities and specialist music schools offer undergraduate and postgraduate degrees in music production and sound engineering. These programs provide structured learning, access to professional equipment, and industry connections. However, formal education is neither the only nor necessarily the fastest path to professional competence.

    Online Learning — YouTube, Courses, and Communities

    The free and low-cost online learning ecosystem for sound engineering is extraordinary in 2026. YouTube channels covering mixing, mastering, and recording techniques collectively represent thousands of hours of expert instruction available at no cost. Paid platforms like Skillshare, Coursera, and LinkedIn Learning offer structured courses taught by working professionals. Communities on Reddit (r/audioengineering, r/mixingmastering), Discord, and specialized forums provide peer learning, feedback, and professional connections.

    The Most Important Practice Habit — Finish and Analyze

    The fastest way to develop sound engineering skills is to finish tracks — not perfect them endlessly — and then critically analyze them against professional reference tracks in your genre. Identify the three things that make the professional track sound better than yours. Research how to address those specific gaps. Apply what you learn to the next track. Repeat this cycle relentlessly and your skills will compound rapidly.


    From Sound Engineering to Releasing Your Music Globally

    Learning sound engineering is one half of the independent artist journey. The other half is getting your finished music to the listeners who will love it.

    Why Great Engineering Deserves Great Distribution

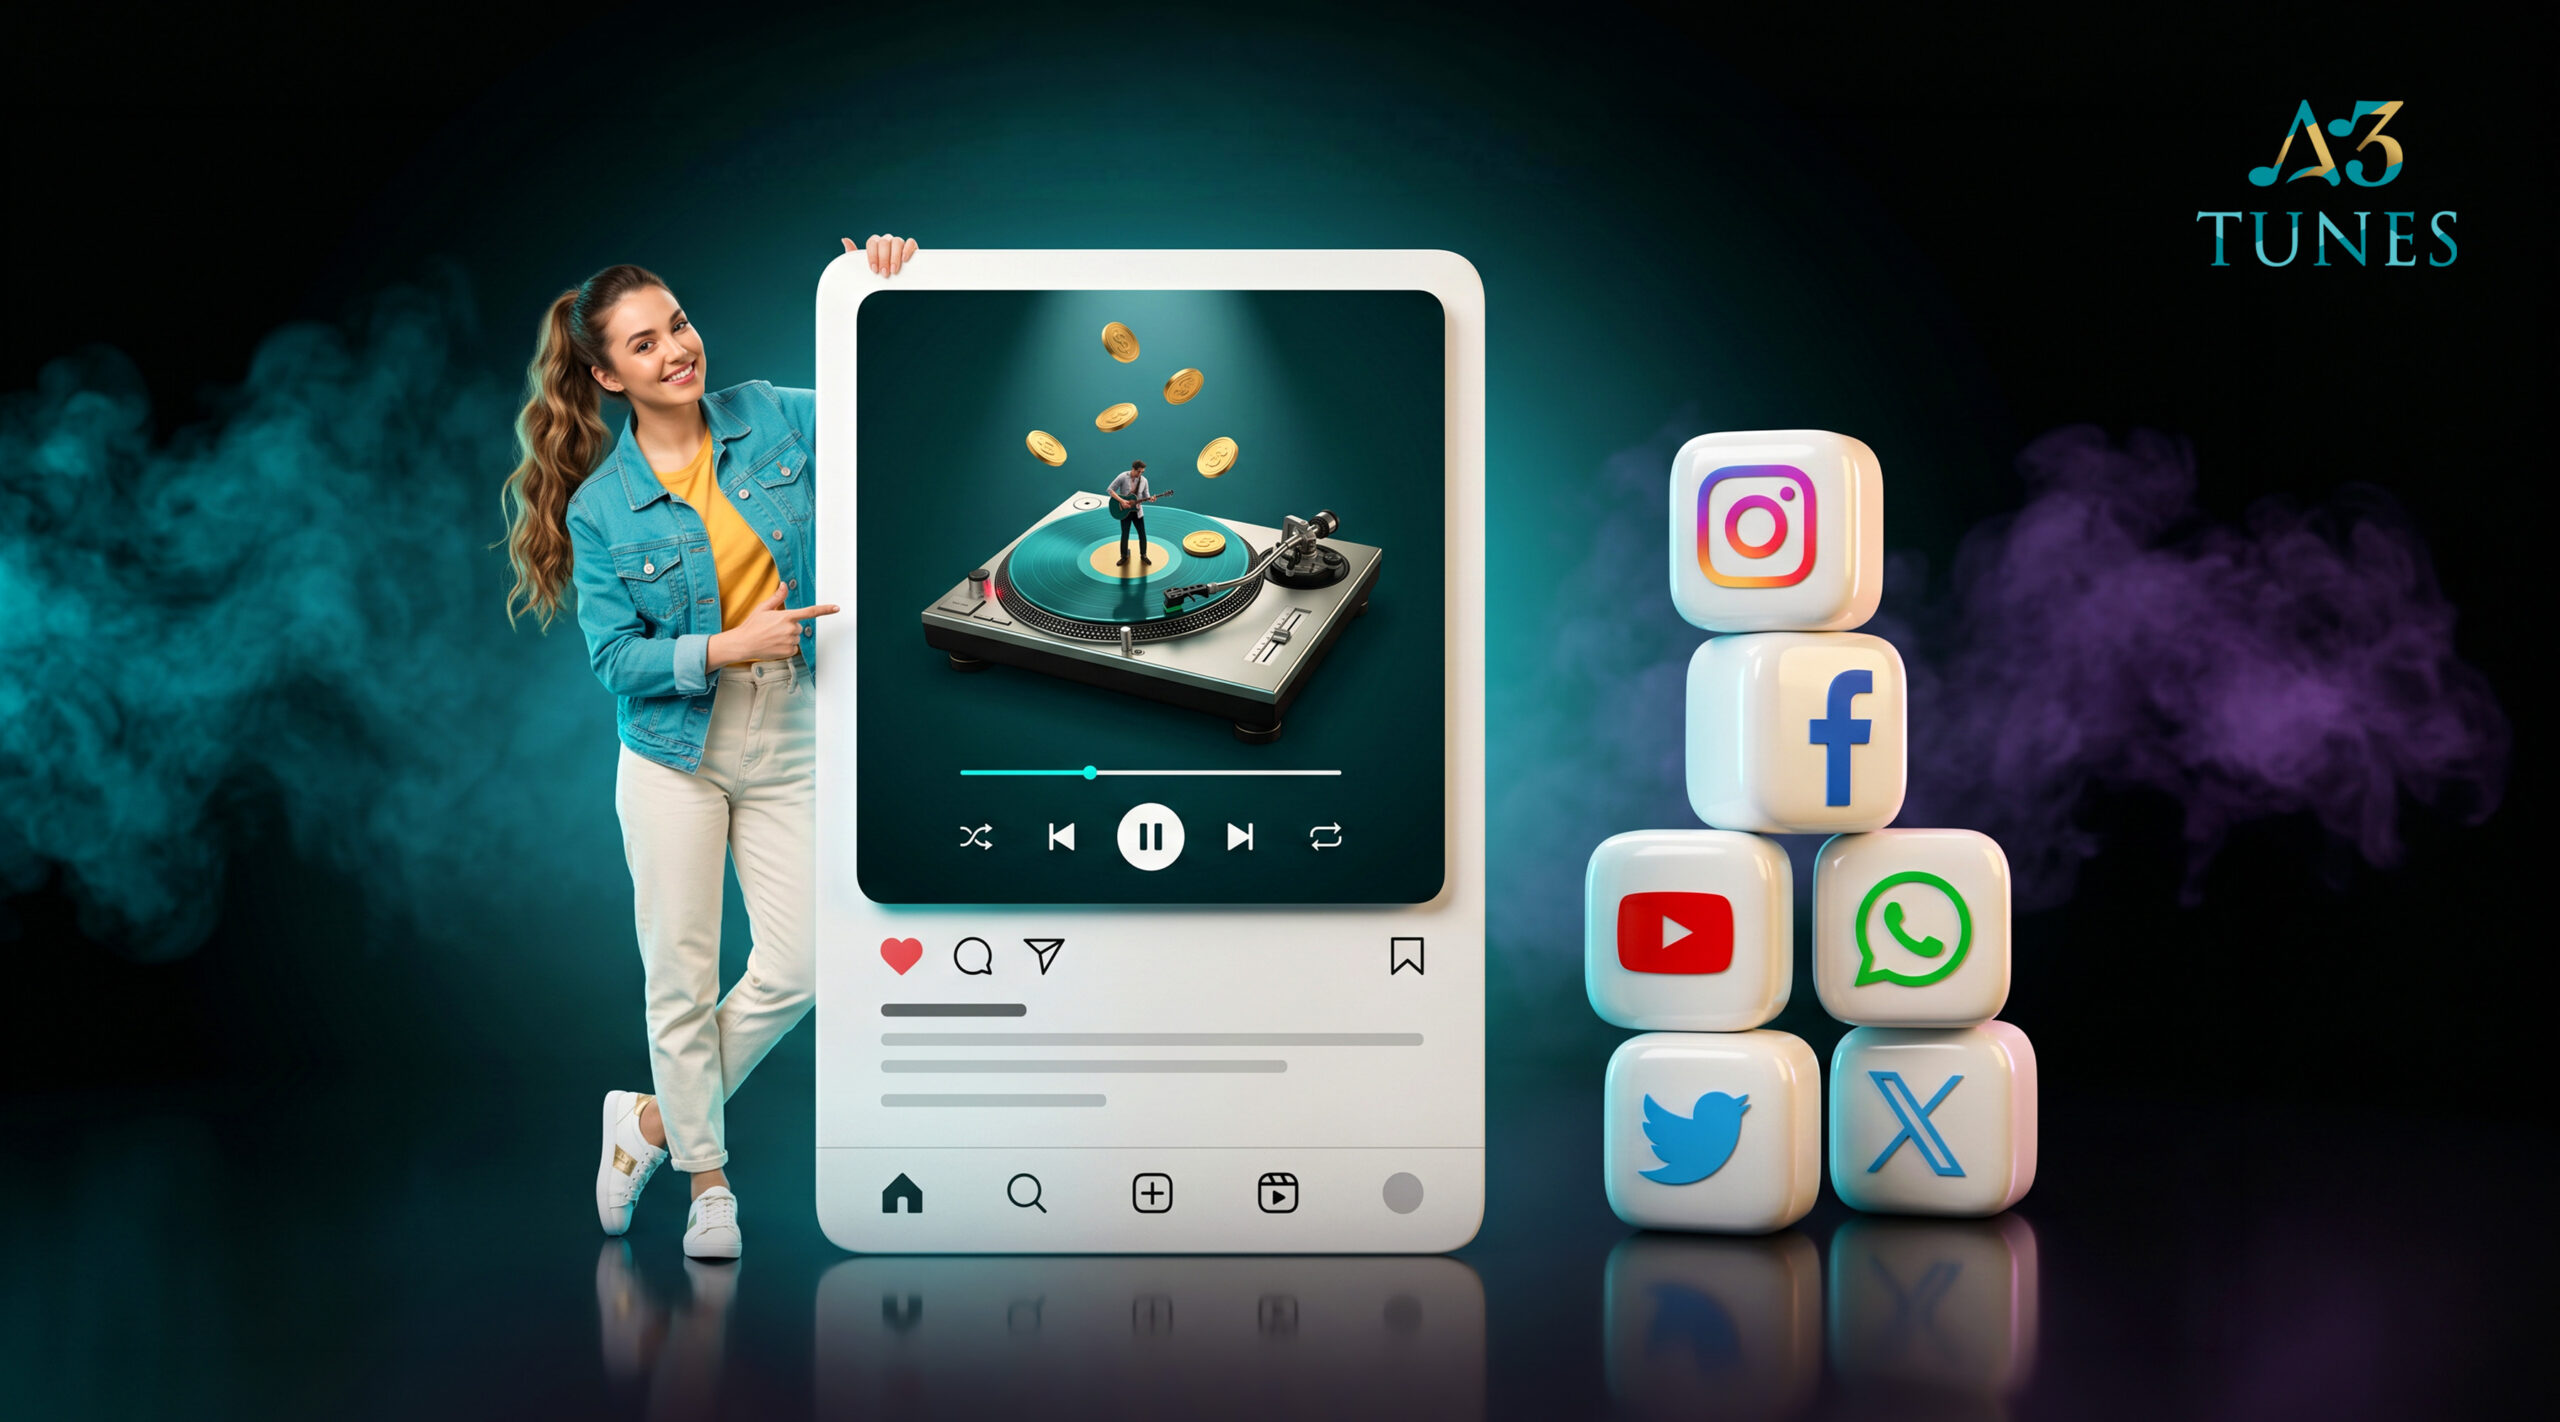
    A beautifully engineered track that sits on a hard drive reaches nobody. Distribution is what takes your sound-engineered, mixed, and mastered music and delivers it to Spotify, Apple Music, JioSaavn, YouTube Music, Amazon Music, Instagram, TikTok, and over 150 other streaming platforms where billions of listeners discover music every day.

    A3 Tunes makes this global distribution step affordable and accessible for every independent artist — whether you are releasing your first single or managing a growing catalog of releases across genres and languages.

    Distribute Your Music Through A3 Tunes for ₹1 a Day

    A3 Tunes offers global distribution to 150+ streaming platforms starting at just ₹1 a day under the Startup Plan — roughly $10 a year — with full rights retention, 100% royalty earning, ISRC and UPC code generation, real-time analytics, and comprehensive rights management.

    Whether you produced and engineered your music in a professional studio or a bedroom home studio, A3 Tunes ensures it reaches the same global audience. Explore the A3 Tunes pricing plans and start your distribution journey today.


    Frequently Asked Questions About Sound Engineering

    What exactly does a sound engineer do?

    A sound engineer captures, processes, and reproduces audio to achieve a desired sonic result. This includes recording audio through microphones and interfaces, editing and organizing recorded material, mixing individual tracks into a balanced stereo output using EQ, compression, and effects, and mastering the final mix for distribution across streaming platforms and physical formats.

    Is sound engineering the same as music production?

    No, but they overlap significantly. Music production is the broader creative process of developing a song or album — the artistic direction, arrangement, and creative decisions. Sound engineering focuses specifically on the technical audio processes — recording, mixing, signal processing, and mastering. Independent artists frequently perform both roles simultaneously.

    How long does it take to learn sound engineering?

    Basic competency in recording and mixing can be developed within six to twelve months of consistent practice. Professional-level proficiency — where your mixes compete with commercial releases in your genre — typically takes two to five years of dedicated learning and practice. The key variable is not time but consistency and the discipline of analyzing and improving each project.

    What equipment do I need to start learning sound engineering?

    The minimum setup to begin learning sound engineering is a computer, a DAW (free options like BandLab Studio and Cakewalk are sufficient to start), a pair of quality studio headphones (Audio-Technica ATH-M50x or equivalent), and an audio interface with at least one microphone input (Focusrite Scarlett Solo is an excellent entry point). A condenser microphone is needed for recording vocals or acoustic instruments.

    Can I learn sound engineering without formal education?

    Absolutely. Many of today’s most respected sound engineers are self-taught. The wealth of free and low-cost learning resources available in 2026 — YouTube tutorials, online courses, software that ships with tutorial content, active online communities — makes self-directed learning genuinely viable. The critical factor is not formal education but consistent practice, critical listening, and honest self-assessment.

    What is the difference between mixing and mastering?

    Mixing is the process of combining and processing individual recorded tracks into a cohesive stereo mix — balancing volumes, applying EQ and compression, adding effects, and creating a spatial image. Mastering is the final stage of audio processing applied to the completed stereo mix — optimizing overall tonal balance, loudness, and consistency for distribution across all playback systems and streaming platforms.

    How do AI tools help beginner sound engineers?

    AI tools assist beginners in multiple ways — AI mixing assistants like iZotope Neutron suggest EQ and compression decisions that teach as they fix, AI mastering platforms like LANDR deliver streaming-ready masters in minutes, stem separation tools help beginners analyze professional recordings by isolating individual elements, and AI noise reduction tools rescue problematic recordings that would previously have been unusable.

    How do I release music I have engineered and produced myself?

    Once your music is recorded, mixed, and mastered to a finished WAV or FLAC file, you need a music distributor to deliver it to streaming platforms. A3 Tunes distributes your music to 150+ platforms — including Spotify, Apple Music, JioSaavn, and YouTube Music — starting at just ₹1 a day, with full rights retention and 100% royalty earning. Sign up with A3 Tunes to get started.


    Final Thoughts

    Sound engineering is one of the most rewarding creative and technical disciplines in the music world — and in 2026, it has never been more accessible to beginners. The same tools that professional recording studios used to charge thousands of dollars per day to access are now available in your bedroom, on your laptop, for a fraction of the historical cost. AI tools are lowering the technical barriers even further, helping beginners achieve professional-quality results while learning the skills that will make them great engineers over time.

    For independent artists, understanding sound engineering is not just an optional bonus skill. It is the fundamental craft that determines whether your music sounds like a professional release or a rough demo. It is the difference between a track that gets skipped in the first five seconds and one that earns a save, a share, and a loyal new listener.

    The path forward is simple but requires consistent effort — learn the fundamentals of signal flow, EQ, and compression. Build your home studio setup step by step. Finish tracks rather than perfecting them endlessly. Reference your mixes against professional releases. Analyze what makes the gap and close it, one project at a time.

    And when your music is ready to share with the world, A3 Tunes is ready to distribute it globally — to 150+ streaming platforms, with full rights retention, 100% royalty earning, and pricing starting at just ₹1 a day.

    Your sound deserves to be heard. Start your journey with A3 Tunes today and take your music from your studio to the world.

  • Everything You Need to Know About Music Distribution

    Everything You Need to Know About Music Distribution

    The music industry has transformed dramatically over the past decade. What once required signing a contract with a record label, pressing physical CDs, and praying for radio play has now become something any artist can do from their bedroom with a laptop and a song. At the heart of this revolution sits one powerful concept — music distribution.

    If you are an independent artist, producer, songwriter, or even an established label looking to reach a global audience, understanding music distribution is no longer optional. It is the foundation of every modern music career. In 2026, over 120,000 tracks are uploaded to streaming platforms every single day, and independent artists now earn nearly half of all Spotify royalties paid out globally. The opportunity has never been bigger — but neither has the competition.

    This complete guide walks you through everything you need to know about music distribution: how it works, why it matters, how to choose the right service, the latest industry trends, the mistakes to avoid, and how a platform like A3 Tunes can help you launch your music to the world for just $10 a year. By the end of this article, you will have a clear roadmap to release your music globally, retain your rights, earn royalties, and build a sustainable career as an independent artist.

    What Is Music Distribution? Understanding the Basics

    Music distribution is the process of getting your recorded music onto digital streaming platforms, online stores, and social media apps so that listeners around the world can discover, stream, download, and share it. In simple terms, it is the bridge between an artist’s finished track and the global audience waiting to hear it.

    Without distribution, your music stays trapped on your hard drive or limited to a handful of listeners on personal channels. With distribution, the same song can appear on Spotify, Apple Music, YouTube Music, JioSaavn, Amazon Music, Deezer, Instagram, TikTok, and over a hundred other platforms — often within just a few days.

    How Digital Music Distribution Works in 2025–2026

    Digital music distribution follows a consistent pipeline regardless of which service you use. The process begins when you upload your audio file (usually in WAV, FLAC, or high-quality MP3 format) along with cover art, metadata, and release information to a distribution platform. The distributor then formats your release to meet each streaming service’s specific technical requirements, generates unique identifiers like ISRC codes for tracks and UPC codes for releases, and delivers your music to the platforms you have selected.

    Once your music goes live, the distributor collects royalties from every territory where your song is streamed or purchased, processes those earnings, and pays them out to you according to its reporting cycle. Modern distribution platforms also handle metadata corrections, takedown requests, content ID claims on YouTube, and increasingly even AI disclosure compliance for tracks involving generative tools.

    The shift toward AI-assisted production and stricter platform policies has made the distributor’s role more important than ever. Today, a quality distributor does not just upload your music — it acts as a long-term partner across your entire release strategy.

    The Difference Between Physical and Digital Music Distribution

    Physical music distribution refers to the manufacturing, shipping, and retail placement of tangible formats like vinyl records, CDs, and cassette tapes. While vinyl has enjoyed a notable comeback among collectors and audiophiles, physical distribution today represents only a fraction of total industry revenue and primarily serves niche markets and superfans.

    Digital music distribution, by contrast, dominates the modern landscape. Streaming alone now accounts for over 67% of global recorded music revenue, and that share continues to grow. Digital distribution is faster, cheaper, more scalable, and accessible to any artist with an internet connection. There are no inventory costs, no shipping logistics, and no minimum order quantities — your music exists everywhere at once, ready to be discovered by anyone, anywhere.

    For independent artists in 2026, digital distribution is the default and often the only realistic path to a global audience.

    Key Terms Every Artist Should Know (DSPs, ISRC, UPC, Metadata)

    Before diving deeper, it helps to understand the vocabulary of music distribution. DSPs, or Digital Service Providers, are the platforms where your music lives — Spotify, Apple Music, JioSaavn, YouTube Music, and so on. ISRC stands for International Standard Recording Code, a unique identifier assigned to every individual sound recording that allows it to be tracked across all platforms and territories. UPC (Universal Product Code) is a similar identifier but applied at the release level, such as an album or EP.

    Metadata refers to the information attached to your music — track titles, artist names, songwriter credits, genre tags, release date, language, and so on. Clean, accurate metadata is one of the most overlooked yet most important parts of a successful release. Errors in metadata cause delays, misattributed royalties, and even rejected uploads. Modern distributors like A3 Tunes handle metadata formatting and code generation automatically, but the artist remains responsible for providing correct information at the upload stage.

    Why Music Distribution Matters for Independent Artists

    The independent music sector is experiencing one of the most significant shifts in industry history. Independent market share of global recorded music has grown from approximately 30% in 2020 to over 40% in 2025, and that number continues to climb. For the first time in modern history, artists no longer need a record label to reach a global audience — they need a distribution partner.

    How Independent Artists Are Winning Without a Record Label

    The traditional record label model required artists to give up significant ownership of their masters, accept advances that needed to be recouped, and operate within timelines and creative directions dictated by the label. Today, distribution democratization has eliminated the distribution advantage that labels once held exclusively. Any artist can now access global streaming platforms for minimal cost, retain full ownership of their music, and build direct relationships with fans.

    Macklemore’s self-released “Thrift Shop” hitting number one worldwide, Chance the Rapper winning Grammys without a label, and countless smaller-scale success stories prove that the right distribution strategy can take an unsigned artist to the top of the charts. In India specifically, independent artists across genres like Tamil folk, Punjabi pop, Assamese rap, and Bollywood-influenced indie are building substantial followings entirely on their own terms.

    The calculation has shifted permanently. Artists now value ownership of their masters and creative control more than the marketing muscle a label might provide. A good distributor closes the remaining gap.

    The Role of Music Distribution in Building a Global Fanbase

    Distribution is the first and most essential step in building a global audience. When your music is available on Spotify, Apple Music, JioSaavn, and YouTube Music simultaneously, a listener in Mumbai, Tokyo, Toronto, or São Paulo can discover your track through algorithmic playlists, editorial features, social media clips, or simple word of mouth.

    Modern distribution platforms also integrate with Instagram, TikTok, Reels, and Facebook Stories, meaning your music can soundtrack user-generated content across the world. A single viral clip on TikTok or Reels can transform an unknown artist into a global name overnight — but none of that is possible if your music is not properly distributed in the first place.

    How Streaming Royalties Are Generated Through Distribution

    Every time someone streams your song, downloads it, or uses it in a video, you earn a small royalty. These royalties are collected by the streaming platforms, paid to your distributor, and then passed on to you. The exact amount per stream varies by platform, country, and listener subscription type, but the model is simple: more streams across more platforms means more income.

    Quality distributors provide transparent dashboards showing exactly where your streams are coming from, which countries are growing your audience fastest, and how much you have earned in any given period. This data is invaluable for planning tours, targeting ad campaigns, and making informed decisions about your next release.

    Types of Music Distribution Services Explained

    Not all music distribution services are created equal. They differ in pricing models, royalty splits, platform reach, additional features, and the kind of artist they are designed for. Understanding the categories helps you pick the right partner for your stage of career.

    Free Music Distribution — Pros, Cons, and What to Watch Out For

    Free music distribution services allow you to upload and distribute your music without paying any upfront fees. Platforms like Amuse’s free tier and UnitedMasters offer this model, and on the surface it sounds ideal for beginners. However, free services almost always come with trade-offs.

    Some free distributors take a percentage of your royalties — often anywhere from 10% to 30% — in exchange for the no-cost upload. Others limit your access to features like YouTube Content ID monetization, faster payouts, advanced analytics, or priority customer support. A few have faced criticism for slow payment processing or poor service quality.

    Free distribution works well as a way to test the waters with a single release, but most serious artists outgrow these limitations quickly. If your goal is long-term growth, the percentage taken from your royalties often ends up costing more than a low annual subscription.

    Paid Music Distribution Plans — What You Get for Your Money

    Paid music distribution services charge a flat annual or per-release fee and typically let you keep 100% of your royalties. This model is offered by services like DistroKid, TuneCore, CD Baby, and A3 Tunes. The benefits are significant: faster payouts, better support, access to advanced features like Spotify pre-saves, YouTube Content ID, sync licensing opportunities, and detailed analytics dashboards.

    A3 Tunes stands out in this category by offering professional-grade distribution starting at just $10 per year — one of the most affordable price points in the global market. For that fee, artists get distribution to over 150 streaming platforms, full rights retention, real-time performance tracking, and dedicated artist support.

    The math is simple: if your music earns even a small amount in royalties, a flat-fee distributor pays for itself many times over compared to a percentage-based free service.

    AI-Powered Music Distribution — The New Frontier for Independent Artists

    Artificial intelligence has become the defining force in the music industry in 2025 and 2026. AI tools now assist with mastering, metadata tagging, playlist pitching, fan discovery, and release strategy. AI-powered distribution platforms use machine learning to recommend optimal release times, suggest target playlists, and even predict which markets will respond best to a given track.

    A3 Tunes positions itself as the world’s first AI-powered DIY global music distribution platform, integrating intelligent recommendations and automation directly into the upload and tracking workflow. As DSPs like Spotify and Apple Music tighten their policies around AI-generated content, distributors that build compliance tools and clear guidelines into their platforms give artists a significant advantage.

    This is the direction the entire industry is moving in, and choosing a forward-looking distributor positions you to benefit from these shifts rather than scramble to catch up.

    How to Choose the Right Music Distribution Platform

    With dozens of distribution services available, picking the right one can feel overwhelming. The right choice depends on your career stage, release frequency, budget, and long-term goals. Here are the key factors to evaluate.

    Royalty Percentage vs. Flat Fee — Which Model Is Better?

    This is the single biggest financial decision you will make. Percentage-based services take a cut of every dollar you earn forever, which can become very expensive once your streams grow. Flat-fee services charge predictable annual or release fees and let you keep everything you earn.

    For most artists who plan to release regularly and grow their catalog, flat-fee subscription models are significantly more cost-effective. A $10 per year plan like A3 Tunes pays for itself with just a few hundred streams, after which every additional play is pure profit.

    The only scenario where percentage-based makes sense is for artists who plan to release only once or twice and do not expect significant streaming activity — but even then, the difference is often negligible.

    Platform Reach — Why 150+ Stores Matter for Your Music Career

    The number of platforms your distributor delivers to directly affects how discoverable your music is. The major DSPs — Spotify, Apple Music, YouTube Music, Amazon Music — are essential, but so are regional powerhouses like JioSaavn and Gaana in India, NetEase Cloud Music in China, Anghami in the Middle East, and Boomplay across Africa.

    A distributor that reaches 150 or more platforms gives your music the widest possible chance to be discovered. A3 Tunes delivers to over 150 streaming platforms and social apps including Spotify, Apple Music, JioSaavn, YouTube Music, Instagram, TikTok, Deezer, Gaana, and many more, making it especially well-suited for artists targeting both international and Indian audiences.

    Music Rights Management and Who Owns Your Music

    One of the biggest reasons artists go independent is to retain ownership of their masters and creative work. A good distributor never takes ownership of your music — it simply acts as a delivery and royalty collection service. Always read the terms carefully before signing up with any platform.

    Beyond ownership, look for distributors that actively support rights management. This includes publishing rights administration, mechanical royalty collection, performance rights tracking, and synchronization licensing for film, TV, ads, and remixes. A3 Tunes offers comprehensive rights support across publishing, mechanical, performance, and synchronization rights, helping artists earn from every legitimate use of their music.

    Dashboard, Analytics, and Real-Time Reporting Features

    Data is power in the modern music business. A quality dashboard shows you which songs are performing, where your listeners are located, how much you have earned, and which platforms are driving the most engagement. Without this information, you are essentially flying blind.

    Look for distributors that offer real-time or near-real-time reporting, detailed geographic breakdowns, playlist tracking, and clear royalty statements. These tools turn raw streaming data into actionable insights that can shape your entire release strategy.

    Step-by-Step Guide to Distributing Your Music Online

    Releasing music globally for the first time can feel intimidating, but the process is more straightforward than most artists realize. Here is the workflow from finished track to live release.

    Preparing Your Music for Distribution — Format, Artwork, and Metadata

    Before you upload anything, make sure your assets are ready. Your audio should be exported as a high-quality WAV or FLAC file at 16-bit or 24-bit resolution and 44.1 kHz sample rate or higher. Mastered audio always performs better than unmastered — if you cannot afford professional mastering, even basic AI-based mastering services can dramatically improve sound quality.

    Your cover art must be a square image, typically 3000 by 3000 pixels, in JPG or PNG format, with no blurry text, web addresses, or unauthorized logos. Metadata should include accurate track titles, artist names exactly as you want them displayed, primary and secondary genres, language, songwriter and producer credits, and the planned release date.

    Clean preparation prevents 90% of rejection issues and delays.

    How to Upload and Release Your Music Globally

    Once your assets are ready, sign up for your chosen distribution service. With A3 Tunes, the process takes just a few minutes — register with your email or mobile number, choose your plan, and access the upload dashboard. Upload your audio file along with artwork and metadata, choose the streaming platforms you want to reach, and confirm the release.

    The distributor handles formatting for each DSP, generates your ISRC and UPC codes, and submits your music to all selected platforms. Most distributors deliver music to Spotify within two to seven business days, though setting a release date at least three to four weeks in advance gives you the best shot at editorial playlist consideration.

    Setting Your Release Date and Pre-Save Strategy

    Release date strategy is one of the most underrated elements of a successful launch. Most major releases drop on Fridays globally to align with chart cycles, but the specific Friday matters too. Avoid weeks crowded with major artist releases unless you have a strong reason to compete head-to-head.

    Pre-save campaigns are essential in 2026. They allow fans to commit to streaming your song the moment it drops, which boosts first-day momentum and signals to algorithms that your release deserves attention. Quality distributors offer built-in pre-save tools or integrate with services that do.

    Build hype in the weeks leading up to release with social media teasers, behind-the-scenes content, and direct messaging to your existing fanbase. The first 48 hours after release are the most algorithmically important.

    How to Monitor Performance After Your Music Goes Live

    Once your music is live, the work is just beginning. Use your distributor’s dashboard to track daily streams, geographic spread, playlist additions, and revenue. Look for unexpected spikes — they often signal a TikTok or Reels moment that you can amplify with paid promotion.

    Submit your tracks to independent playlist curators, pitch to editorial teams through Spotify for Artists, and engage directly with fans who post your music on social media. Monitoring performance closely lets you double down on what is working and learn from what is not.

    Music Distribution in India — Opportunities for Regional Artists

    India is one of the most exciting and rapidly growing music markets in the world. With over a billion potential listeners, hundreds of distinct languages and dialects, and a streaming culture that crosses age groups and economic backgrounds, the opportunity for Indian artists has never been larger.

    The Rise of Independent Music in the Indian Music Industry

    For decades, the Indian music industry was dominated by film soundtracks and a handful of major labels. That has changed dramatically. Independent artists across genres — indie pop, hip-hop, fusion, classical, devotional, regional folk — are now building substantial fanbases entirely outside the traditional Bollywood ecosystem.

    Platforms like JioSaavn and Gaana have made local-language content more accessible than ever, while global platforms like Spotify and YouTube Music aggressively promote Indian independent music both domestically and internationally. The result is a thriving creator economy where bedroom producers in Tier 2 and Tier 3 cities can reach audiences that were unreachable a decade ago.

    How to Get Your Music on JioSaavn, Gaana, and Indian Platforms

    To reach Indian streaming platforms, you need a distributor that delivers directly to JioSaavn, Gaana, Wynk, Hungama, and other regional services. Many international distributors focus primarily on Western platforms and treat Indian DSPs as an afterthought.

    A3 Tunes, headquartered in Bengaluru and built specifically with the Indian market in mind, distributes to all major Indian streaming services alongside global platforms. This dual focus makes it an ideal choice for artists who want to win both at home and abroad without compromising on either.

    Supporting Regional Languages and Genres Through Distribution

    India’s linguistic and cultural diversity is one of its greatest creative strengths. From Tamil folk and Malayalam indie to Punjabi rap, Bengali rock, Assamese hip-hop, and Marathi pop, regional music is having a renaissance. Modern distribution platforms support metadata in dozens of languages and let artists tag their music accurately so it reaches the right audiences.

    A3 Tunes specifically supports Indian languages and genres across its catalog, ensuring that regional artists are not pushed into the margins by platforms optimized only for English-language content.

    Understanding Music Royalties and Rights in Distribution

    Royalties are how artists actually get paid, and the system is more complex than most beginners realize. Understanding the different types of rights and the income each one generates is essential to building a sustainable career.

    Publishing Rights, Mechanical Rights, and Performance Rights Explained

    Publishing rights relate to the underlying composition of a song — the melody, lyrics, and musical structure — as opposed to a specific recording. Whenever your song is used in a commercial context (ads, films, TV shows), publishing royalties are generated.

    Mechanical rights are triggered whenever your music is reproduced, whether through downloads, physical copies, or interactive streams. Each play on a streaming service generates a small mechanical royalty in addition to other payments.

    Performance rights apply when your music is performed publicly — played in restaurants, bars, on radio, on television, or during live events. Performance rights organizations like ASCAP, BMI, PRS, and IPRS collect these royalties on behalf of songwriters and publishers.

    A complete distribution and rights management service ensures you collect from all three streams, not just one.

    Synchronization and Adaptation Rights — New Revenue Streams

    Synchronization licensing — placing your music in films, TV shows, advertisements, video games, and online content — has become one of the most lucrative income streams for independent artists. A single sync placement can pay more than millions of streams.

    Adaptation rights cover remixes, cover versions, and translations of your original work. Modern distributors like A3 Tunes help artists license their music for sync opportunities and manage adaptation rights, opening doors that were once accessible only through major labels.

    How to Maximize Your Streaming Royalty Income

    Maximizing royalties requires both volume and strategy. Release music consistently — algorithms and listeners both reward frequent activity. Tag your metadata accurately so all royalty types are correctly attributed. Register with performance rights organizations relevant to your country and a publishing administrator that collects mechanical royalties globally.

    Diversify your revenue beyond streaming with merchandise, direct fan support platforms, live performances, and sync opportunities. The most successful independent artists in 2026 treat streaming as one income stream among several rather than their only source of income.

    Common Mistakes Artists Make in Music Distribution

    Even experienced artists make avoidable mistakes when distributing their music. Watching for these pitfalls saves you time, money, and lost opportunities.

    Releasing Music Without Proper Metadata

    This is the single most common mistake. Incorrect or inconsistent artist names, misspelled track titles, wrong genre tags, and missing songwriter credits cause royalties to be misattributed or lost entirely. Some platforms will reject releases with poor metadata outright, delaying your launch by weeks.

    Always double-check every field before submitting. Keep a master document with your exact artist name, social media handles, and standard credits so you can copy and paste consistently across releases.

    Ignoring Release Date Strategy and Pre-Save Campaigns

    Dropping music with no advance planning is a missed opportunity. Without pre-save campaigns, social media teasers, and editorial pitches, your release lands with no momentum and gets buried under the 120,000+ other tracks uploaded that day.

    Plan releases at least three to four weeks in advance. Build hype. Submit to editorial playlists through Spotify for Artists at least seven days before release. Treat every drop as a marketing event, not just an upload.

    Choosing a Distributor Based on Price Alone

    The cheapest distributor is not always the most cost-effective. A free service that takes 20% of your royalties forever costs far more than a $10 per year subscription once you have meaningful streams. Conversely, an expensive distributor that does not deliver to the platforms you need is a waste of money no matter how good its other features are.

    Evaluate distributors holistically — platform reach, royalty model, rights support, analytics, customer service, and long-term value. A3 Tunes hits the sweet spot for most independent artists by combining ultra-affordable pricing with full platform reach and professional features.

    Music Distribution Trends Shaping the Industry in 2026

    The distribution landscape is evolving faster than ever. Staying informed about emerging trends helps you make decisions that pay off long term.

    AI Integration in Music Distribution Platforms

    Artificial intelligence is now embedded across the entire music value chain. AI tools assist with mastering, metadata tagging, playlist pitching, and audience discovery. Distribution platforms that integrate AI intelligently — for upload optimization, release strategy, and analytics — give artists a significant competitive edge.

    At the same time, streaming platforms are introducing stricter rules around AI-generated content, requiring disclosure for tracks created with generative tools. Distributors that build compliance into their platforms help artists navigate these evolving policies smoothly.

    Direct-to-Fan Revenue Beyond Streaming

    Relying solely on streaming royalties is increasingly fragile. Per-stream rates fluctuate, algorithms change, and platforms can shift policies without warning. Smart artists are diversifying with merchandise, ticketed live streams, fan subscription platforms, exclusive content drops, and direct sales.

    Forward-thinking distributors are adding tools for direct fan engagement — pre-save campaigns, email list building, merch integration, and fan-gated content. The future belongs to artists who own their fan relationships, not just their masters.

    The Growing Market Share of Independent Artists

    Independent artists now account for over 40% of global recorded music revenue, and that number is growing every year. Half of all royalties paid out by Spotify in 2025 went to independent artists. This shift has fundamentally changed the power dynamic in the industry — labels need indie artists more than indie artists need labels.

    The implication is clear: independent music is no longer the alternative path. It is the default path. And the distributor you choose is the single most important strategic decision in that path.

    Why A3 Tunes Is the Smart Choice for DIY Music Distribution

    With dozens of distributors competing for independent artists, A3 Tunes has carved out a unique position by combining affordability, global reach, and artist-first features into one platform built for the modern music creator.

    Affordable Pricing — Distribute Your Music at Just $10/Year

    At just $10 per year under its Startup Plan, A3 Tunes offers one of the most accessible price points in the global music distribution market. There is no hidden royalty cut, no surprise fees, and no long-term lock-in. Artists keep 100% of their earnings and pay a transparent flat fee for the service.

    This pricing makes professional-grade distribution accessible to artists at every stage — from first-time uploaders to established independent musicians managing growing catalogs.

    150+ Platforms, Full Rights Retention, and a Powerful Dashboard

    A3 Tunes distributes to over 150 streaming services and social platforms including Spotify, Apple Music, JioSaavn, YouTube Music, Instagram, TikTok, Gaana, Deezer, Amazon Music, and many more. Artists retain full ownership of their music and rights at all times.

    The built-in dashboard provides real-time updates on streams, revenue, fan locations, and platform-specific performance, giving artists the data they need to make informed decisions about their next release, tour, or campaign. Comprehensive rights management support covers publishing, mechanical, performance, and synchronization rights.

    Built for Independent Artists in India and Beyond

    Headquartered in Bengaluru, A3 Tunes is uniquely positioned to serve Indian independent artists while also delivering global reach. The platform supports Indian languages and genres across the country’s full diversity — from Tamil folk to Assamese rap, from Punjabi pop to Malayalam indie — and connects regional artists with both domestic and international audiences.

    Backed by Aiplex, A3 Tunes combines startup-friendly agility with enterprise-grade infrastructure, making it a trustworthy long-term partner for serious independent musicians anywhere in the world.

    Frequently Asked Questions About Music Distribution

    What is music distribution in simple terms? Music distribution is the process of delivering your recorded music to streaming platforms and online stores like Spotify, Apple Music, and JioSaavn so listeners worldwide can discover and stream your songs. It is the bridge between a finished track and a global audience.

    How much does it cost to distribute music in 2026? Costs vary widely. Free services typically take a percentage of your royalties, while paid services charge flat annual fees. A3 Tunes offers professional distribution starting at just $10 per year with no royalty cut, making it one of the most affordable options globally.

    Do I need a record label to distribute my music? No. Modern digital distribution platforms let any independent artist upload music directly to all major streaming services without a record label. Independent artists now account for over 40% of global recorded music revenue.

    How long does it take for my music to appear on Spotify after distribution? Most distributors deliver music to Spotify within two to seven business days. Setting your release date at least three to four weeks in advance gives you the best chance of editorial playlist consideration and a successful launch.

    Who owns my music after I distribute it through a service like A3 Tunes? You retain 100% ownership of your music and all associated rights. A3 Tunes acts only as a delivery and royalty collection service — your masters, publishing rights, and creative control remain entirely yours.

    Can I distribute music in regional Indian languages? Yes. A3 Tunes proudly supports Indian languages and genres across the country’s full diversity, from Tamil folk and Punjabi pop to Bengali rock, Assamese rap, and beyond. Regional artists can reach both Indian and global audiences through a single upload.

    What is the best music distribution service for beginners? For beginners looking for affordability, global reach, and full rights retention, A3 Tunes offers an excellent starting point at just $10 per year, with distribution to over 150 platforms and a beginner-friendly dashboard.

    Final Thoughts

    Music distribution in 2026 is no longer a barrier — it is an opportunity. The tools, platforms, and economic models that once made the music industry inaccessible to independent artists have been completely transformed. Anyone with a song and a story can now reach a global audience for the price of a coffee.

    The artists who succeed in this new landscape are the ones who treat distribution as a strategic foundation rather than a one-time task. They choose the right distributor, prepare their releases carefully, leverage pre-save campaigns and editorial pitches, monitor their performance data, and diversify their income beyond streaming alone.

    A3 Tunes is built for exactly that kind of artist — independent, ambitious, global-minded, and ready to own their career. With distribution to over 150 platforms, full rights retention, real-time analytics, comprehensive rights management, and pricing starting at just $10 per year, it offers everything an independent artist needs to launch their music to the world and build something that lasts.

    Your music deserves to be heard. The world is waiting. Start distributing today.

  • Top Free Mastering Platforms Every Artist Should Try

    Top Free Mastering Platforms Every Artist Should Try

    Mastering is the final creative and technical step that turns a mix into a polished, professional-sounding track. Every artist dreams of achieving a balanced, loud, and immersive sound, but professional mastering services can be costly. This is why many independent musicians are turning to free online mastering platforms. These tools offer quick, AI-powered solutions to bring out clarity and depth in your mixes without needing a full studio setup or breaking the bank.

    For artists looking to test and compare their mastering options, this guide explores the best free platforms available. You’ll discover what makes each tool stand out, what features are worth your attention, and how to make the most of them. We’ll also touch on why choosing platforms like A3Tunes can give your music that professional edge while keeping your workflow efficient and accessible.

    What You Should Know Before Choosing a Free Mastering Platform

    Before jumping into specific tools, it’s important to understand the core principles of mastering. Mastering doesn’t just make a track louder—it ensures tonal balance, consistent playback across systems, and a unified sonic identity for your music. Free mastering tools can do this efficiently, but only if you know how to use them strategically.

    1. Understanding Mastering vs. Mixing

    Mixing and mastering often get confused, but they serve different purposes. Mixing focuses on balancing instruments within a track—adjusting levels, EQ, and panning. Mastering, on the other hand, refines the final stereo file, applying compression, limiting, and EQ to ensure it sounds cohesive and professional. Free mastering platforms automate many of these steps, but understanding their intent helps artists make better choices.

    2. Importance of Audio Format and Quality

    Before uploading your music to a free online mastering service, ensure you’re using high-quality WAV or AIFF files. MP3s, though convenient, compress data and reduce fidelity. The better your source material, the better your mastered output. Many online tools allow users to upload up to 24-bit audio, preserving detail that enhances the mastering algorithm’s effectiveness.

    3. AI Mastering vs. Manual Mastering

    AI mastering has come a long way, using machine learning to analyze thousands of songs and emulate human mastering decisions. Platforms like A3Tunes, LANDR, and BandLab offer free AI mastering options that are ideal for quick turnarounds. While they can’t fully replace a human engineer, they’re perfect for demos, singles, or even pre-releases that need polish before submission.

    4. Output Consistency and Loudness Standards

    Each platform handles loudness differently. Understanding LUFS (Loudness Units Full Scale) ensures your track meets streaming platform requirements. Services like Spotify and Apple Music normalize tracks to around -14 LUFS, so using a mastering tool that allows control over loudness levels helps avoid distortion or dull playback.

    5. Evaluating Additional Features

    Some free mastering platforms offer features beyond simple processing—such as genre-specific profiles, A/B comparison tools, or integrated distribution. Artists should evaluate which features align with their goals. For example, A3Tunes integrates music promotion and sharing, making it easier for creators to publish and gain visibility.

    Top Free Mastering Platforms Every Artist Should Try

    1. A3Tunes Free Online Mastering

    • A3Tunes offers a smart, user-friendly mastering engine designed to help artists refine their sound effortlessly. Its free online mastering system uses adaptive algorithms that analyze dynamics, tonal balance, and stereo width. The platform’s intuitive interface allows users to preview and compare versions instantly, making it easy to fine-tune results for streaming or live release.
    • What sets A3Tunes apart is its community integration. Beyond mastering, artists can showcase their tracks, gain feedback, and network with other musicians. The platform supports high-quality file uploads and ensures consistent playback across various devices. For musicians aiming to elevate their sonic output while staying within budget, A3Tunes stands as a complete mastering and exposure solution.

    2. LANDR

    • LANDR is one of the most well-known online mastering platforms, offering both free and paid options. It leverages AI-driven mastering chains that adapt to your track’s genre and tone. The free plan allows limited masters per month but provides a valuable way to test how AI interprets your sound. LANDR’s analysis focuses on compression, clarity, and tonal balance, often producing results comparable to entry-level professional mastering.
    • Additionally, LANDR integrates with digital distribution services, allowing users to release their mastered tracks directly to streaming platforms. Though the free tier has restrictions on resolution and exports, it’s a powerful tool for early-stage artists exploring mastering automation.

    3. BandLab Mastering

    • BandLab’s online mastering feature is completely free and designed for simplicity. With just an upload, you can choose between mastering presets such as “CD Quality,” “Warm,” and “Clarity.” These settings provide flexibility depending on your track’s mood or genre. The tool instantly generates mastered versions that can be compared side by side, helping artists make informed creative choices.
    • BandLab’s biggest advantage is its ecosystem—it’s integrated with a free online DAW, collaborative tools, and social sharing. For emerging musicians who want an all-in-one music production and mastering suite, BandLab offers one of the most accessible experiences.

    4. CloudBounce

    • CloudBounce delivers automated mastering with advanced processing capabilities. The platform allows unlimited previews and real-time A/B comparison, enabling users to hear how EQ and compression adjustments affect the mix. Its free version lets users test the process before committing to downloads, offering transparency in mastering quality.
    • For users who eventually wish to upgrade, CloudBounce’s premium features include genre-based mastering and album-wide consistency settings. Even on its free tier, the mastering algorithm intelligently adapts to various styles, ensuring output that feels balanced and professional.

    5. MasteringBox

    • MasteringBox is another popular choice among independent artists for free online mastering. It provides intuitive tools that allow users to adjust loudness, EQ intensity, and stereo width manually before applying automatic mastering. This flexibility appeals to musicians who prefer a bit more control over the process.
    • The platform’s free plan allows standard-quality exports, which are sufficient for testing or demo sharing. It’s particularly suitable for producers who want a lightweight, browser-based mastering solution without complex registration or hidden costs.

    6. eMastered

    • eMastered offers an elegant and AI-driven approach to mastering. Co-founded by Grammy-winning engineers, it’s designed to bring professional-grade mastering to everyone. The platform provides a few free previews, letting users test its tonal and dynamic capabilities. Artists appreciate its clean interface and transparency—showing how each adjustment affects the final sound.
    • While the free plan has limitations, the quality of its algorithm often exceeds expectations. The ability to tweak parameters such as EQ brightness or compression intensity makes it a solid option for those who value creative control.

    7. AudioMaster

    • AudioMaster offers a mobile-first mastering solution ideal for creators producing on tablets or smartphones. Its free app version includes genre presets that instantly adjust volume and tonal character. Whether you’re uploading to YouTube or Spotify, AudioMaster provides balanced sound optimized for streaming compression standards.
    • Its accessibility makes it a great tool for content creators, podcasters, and musicians on the go. For quick masters that maintain clarity and punch, AudioMaster’s free service is a convenient companion to larger studio projects.

    Why Choose A3Tunes for Free Online Mastering

    A3Tunes stands out by combining advanced mastering capabilities with a platform built for artist growth. Unlike other tools that focus solely on processing, A3Tunes supports the entire creative journey—from mastering to publishing and community networking. Its free online mastering tool provides instant, high-quality results while preserving your track’s authenticity.

    Moreover, A3Tunes offers musicians visibility. Artists can upload their mastered work, gain constructive feedback, and collaborate with others through its ecosystem. The platform continuously updates its mastering algorithms to stay current with streaming standards, ensuring your track sounds consistent across major platforms. Whether you’re fine-tuning demos or releasing your first EP, A3Tunes gives you the professional support and tools to take your sound to the next level.

    Conclusion

    The growth of free online mastering platforms has transformed how artists finalize their music. Tools like A3Tunes, BandLab, and LANDR make professional-quality mastering accessible to everyone. They empower independent musicians to compete sonically with major releases without requiring expensive equipment or expert-level knowledge. For beginners, they offer an invaluable learning opportunity; for professionals, a convenient way to test mixes before full-scale production.

    Ultimately, mastering isn’t just about volume it’s about connection. A3Tunes embodies that philosophy by blending powerful mastering technology with community-driven creativity. Visit A3Tunes to explore how its mastering platform can help you produce, refine, and share your best sound today.


  • Spotify Canvas: Make Your Tracks Stand Out

    Spotify Canvas: Make Your Tracks Stand Out

    Introduction

    When it comes to capturing your listeners’ attention in the digital age, visuals play just as important a role as sound. With Spotify Canvas, artists can elevate their tracks by adding short looping visuals that create a more immersive experience. Instead of a static album cover, Spotify Canvas lets you turn your music into a moving piece of art, keeping fans engaged and coming back for more.

    Whether you’re an independent musician or an established artist, Spotify Canvas helps add a unique visual touch that supports your artist identity. Spotify Canvas helps make your music instantly recognizable and memorable. In this detailed guide, we’ll explore how to use Spotify Canvas effectively to enhance your artist profile. We’ll also cover the benefits, creative tips, and how A3Tunes can help you manage your Spotify presence seamlessly, from music distribution and artist guidance. A3Tunes supports your releases with reliable delivery and artist tools, while Spotify for Artists gives you full control over Canvas visuals and profile customization.

    Things to Know Before Using Spotify Canvas

    Before you dive into creating your first Canvas, it’s important to understand how the feature works and what it can do for your brand. These insights will help you make the most of this powerful tool.

    What Is Spotify Canvas?

    Spotify Canvas is a looping visual that plays in the background when listeners stream your music on the Spotify mobile app. Each Canvas is 3–8 seconds long and plays automatically when your track starts, replacing the standard album art.

    These visuals can be animations, abstract designs, motion graphics, or short clips of your performance. The goal is to create a visual connection that enhances the emotion of your music and keeps your audience engaged longer.

    Why Spotify Canvas Matters for Artists

    Visual content is now one of the most effective ways to engage audiences, and Spotify Canvas takes advantage of that trend. Songs with Canvas visuals often see better visual engagement, such as more shares or profile visits.

    For independent artists, Canvas provides a professional touch that helps present their music more professionally on the platform. It’s an opportunity to express creativity beyond sound and reinforce brand identity through visual storytelling.

    Spotify Canvas Requirements and Specifications

    Before uploading, ensure your visuals meet Spotify’s technical requirements. Canvas videos must be 3–8 seconds long, in a vertical format (9:16 ratio), and saved as MP4 or JPEG files. The resolution should be 720px to 1080px wide to maintain clarity across all devices.

    Spotify also recommends avoiding text-heavy visuals, as looping designs work best with abstract or motion-driven imagery. Keeping it minimal ensures your video complements rather than distracts from your music.

    The Impact of Spotify Canvas on Engagement

    Spotify’s research shows that songs featuring a Spotify Canvas have higher listener retention and sharing rates. When fans see movement or storytelling that complements the track, they’re more likely to engage emotionally and remember the song.

    In fact, artists who use Canvas effectively may see better interaction with the listener. This visual layer transforms music from a purely auditory experience into a full sensory one.

    How Canvas Differs from Traditional Music Videos

    While both Canvas and music videos combine visuals with sound, their purposes differ. Music videos tell a story over several minutes, while a Spotify Canvas enhances a track’s mood through short, captivating visuals.

    Think of Canvas as a looping motion poster—something that visually represents your brand and adds character to your profile. It’s the modern evolution of album art in the streaming era.

    How to Create the Perfect Spotify Canvas

    Creating an effective Spotify Canvas is about merging art, emotion, and branding. Here’s how you can craft visuals that enhance your tracks and attract more listeners.

    Step 1: Conceptualize the Visual

    Start by deciding what emotion or idea your song conveys. The best Canvases align with the tone of the music—whether it’s energetic, romantic, or introspective. Sketch ideas that represent your sound visually, such as slow-motion effects for calm tracks or abstract patterns for upbeat ones.

    A3Tunes recommends consistency across your visuals. A cohesive visual identity across all your releases helps fans instantly recognize your work, building a strong artist brand over time.

    Step 2: Create or Select Visuals

    You can design a Canvas using tools like Adobe After Effects, Canva, or even smartphone video editors. If you’re not a visual designer, you can use motion stock videos or collaborate with visual artists.

    Remember to loop your visuals seamlessly. A well-looped Canvas keeps the viewer’s focus on your music without feeling repetitive or jarring.

    Step 3: Upload via Spotify for Artists

    Once your visuals are ready, log in to your Spotify for Artists dashboard. Navigate to “Music,” select the track you want to enhance, and click “Add Canvas.” Upload your file and preview the loop to ensure smooth playback.

    Spotify allows you to change or update your Canvas at any time, so don’t hesitate to experiment with different visuals for seasonal releases or special promotions.

    Step 4: Optimize for Mobile Experience

    Since Spotify Canvas only appears on mobile devices, make sure your visuals are optimized for smaller screens. Avoid text or intricate details that might not translate well. Instead, focus on color, movement, and mood.

    Test your Canvas on multiple devices before publishing to ensure it appears clear and impactful. Subtle movements and smooth transitions tend to perform best across all genres.

    Step 5: Measure Engagement and Iterate

    After uploading your Canvas, use Spotify for Artists’ analytics to monitor listener behavior. Check metrics such as shares, saves, and playlist adds to determine how your visuals affect engagement.

    If one style resonates more with fans, use that insight for future releases. Continuous experimentation ensures your Canvases evolve with your audience’s preferences.

    Creative Ideas for Spotify Canvas Design

    The best Spotify Canvas visuals are the ones that tell a story or evoke emotion. Here are some creative approaches to consider.

    Lyric Motion Loops

    Display a single moving lyric or phrase that connects emotionally with listeners. Keep it minimal but expressive—animated text synced to your beat works well for storytelling.

    Pairing lyrical elements with motion backgrounds creates an elegant yet impactful Canvas that enhances the song’s message without overwhelming it.

    Artist Performance Clips

    Short clips from your music video, studio sessions, or live performances make excellent Canvas visuals. They bring authenticity and connect fans with your creative process.

    Choose dynamic shots—such as slow-motion strumming, dancing, or expressive gestures—that convey emotion and energy.

    Abstract and Motion Art

    Abstract visuals are timeless and versatile. Use swirling colors, particle effects, or glitch aesthetics to evoke mood and rhythm. These work especially well for instrumental, electronic, or ambient genres.

    The key is to align your visuals with the energy of the track. Even a simple animation can elevate your music when executed with intention.

    Behind-the-Scenes Visuals

    Give fans a glimpse into your recording sessions or creative environment. These real, unfiltered moments foster a sense of intimacy and authenticity.

    A behind-the-scenes Canvas helps humanize your brand and build stronger connections with your listeners.

    Album-Themed or Storyline Canvases

    If you’re releasing a full album or EP, create Canvases that share a visual theme. This adds cohesion to your discography and makes your releases feel more cinematic.

    Using similar colors, symbols, or styles across songs strengthens your visual identity and makes your brand more recognizable.

    Why Choose A3Tunes for Spotify Distribution and Artist Support

    Once your Spotify Canvas is ready, you’ll want to ensure your tracks reach the widest audience possible. A3Tunes ensures your songs reach Spotify and other streaming platforms smoothly. Once your music is live, you can upload and manage your Canvas visuals directly through Spotify for Artists. Together, both platforms give you full control over how your music and visuals appear.

    A3Tunes also provides guidance on optimizing your artist profile, using analytics, and growing your fan base. From mastering and distribution to marketing and visual presentation, A3Tunes empowers artists to take full control of their digital journey.

    Conclusion

    Spotify Canvas is more than just a visual add-on—it’s a storytelling tool that can enhance listener experience and help build your visual identity and brand recognition. By pairing your music with captivating visuals, you create a complete sensory experience that leaves a lasting impression.

    With A3Tunes as your partner in distribution and promotion, you can ensure your music and visuals reach the right audience globally. Start experimenting with Spotify Canvas today and let your creativity shine—because in the streaming era, how your music looks can be just as powerful as how it sounds.

  • Free Online Mastering for Studio-Quality Sound

    Free Online Mastering for Studio-Quality Sound

    Introduction

    Every musician dreams of that polished, professional sound that makes a track stand out—but not everyone has access to expensive studio equipment or engineers. Thanks to advances in technology, free online mastering has become a game-changing solution for artists looking to achieve high-quality sound without breaking the bank. Whether you’re producing music from a bedroom studio or preparing an album for streaming, online mastering tools can give your tracks a refined and polished final touch that prepares them well for release.

    In this detailed guide, we’ll explore how free online mastering works, what tools are available, and how platforms like A3Tunes support artists in enhancing their music quality. You’ll learn how to choose the best mastering solution for your style, the benefits of digital mastering, and expert tips to make your music sound studio-ready—all at zero cost.

    Things to Know Before Using Free Online Mastering Tools

    Before jumping into the mastering process, it’s important to understand how online mastering differs from traditional studio mastering. Knowing the basics ensures you get the best results for your tracks.

    What Is Music Mastering?

    Mastering is the final step in music production, where your mix is balanced, equalized, and optimized for streaming, radio, or physical distribution. It ensures consistency across different playback systems and enhances the overall clarity and loudness of your track.

    In traditional settings, mastering is done by professional engineers using specialized equipment. However, with the advent of AI-powered mastering tools offer a convenient way to achieve a polished sound, especially when working without access to a studio.

    How Free Online Mastering Works

    Free online mastering platforms use artificial intelligence and machine learning algorithms to analyze your track and apply dynamic compression, equalization, and limiting automatically. You simply upload your mix, choose a sound profile, and the system generates a mastered version within minutes.

    The best part? These tools are fast, intuitive, and require no prior technical knowledge. For artists seeking efficiency and affordability, they’re an ideal solution. However, it’s crucial to choose a reliable platform to aim to deliver a balanced and clear sound based on the track you upload.

    Pros and Cons of Using Free Online Mastering

    The main advantage of free online mastering is accessibility. Artists can instantly enhance their tracks without needing costly studio sessions or expert engineers. Many tools also allow unlimited revisions, so you can experiment until you’re satisfied.

    On the flip side, automated mastering lacks the personalized touch of a human engineer. While great for demos and independent releases, professional projects may still benefit from hybrid workflows that combine AI mastering with manual adjustments.

    Online mastering works best when the mix is already clean, allowing the tool to enhance it effectively.

    Key Features to Look For in Online Mastering Platforms

    When selecting a mastering platform, pay attention to features like customizable EQ settings, genre-based presets, and preview functionality. Some services even allow A/B comparisons between your original mix and the mastered version.

    Reliable free tools offer clean, dynamic sound and support multiple file formats. Look for user-friendly interfaces that make the mastering process enjoyable and productive.

    Why Quality Monitoring Is Crucial

    Even when using automated tools, you should always monitor your results carefully. Compare your mastered tracks on different devices—headphones, speakers, and car stereos—to ensure balance and clarity.

    This step guarantees that your final master translates well across playback systems. Combining this practice with consistent volume normalization gives your track the professional polish it deserves.

    Top Free Online Mastering Tools for Artists

    There are several excellent online platforms that offer free mastering options. Let’s look at some of the most popular ones available to creators today.

    1. LANDR

    LANDR is one of the pioneers in AI-driven mastering. It uses machine learning to deliver professional results with minimal effort. Simply upload your track, select your mastering intensity, and get an instant preview.

    LANDR’s free plan offers basic mastering and lets artists explore how their track can sound after processing, making it ideal for independent musicians and beginners. For artists using A3Tunes, integrating mastered LANDR tracks ensures the highest quality before distribution.

    2. BandLab Mastering

    BandLab offers completely free online mastering with no hidden costs. It features genre-based presets like “CD Quality,” “Warm,” and “Clarity,” allowing musicians to experiment with different sounds.

    This tool’s instant preview and cloud storage integration make it a favorite among emerging artists. Its simplicity and efficiency make it perfect for quick mastering needs before release.

    3. CloudBounce

    CloudBounce provides fast, AI-based mastering with customization options for tone, loudness, and genre. You can preview your results instantly and tweak the settings to fit your style.

    While CloudBounce offers premium plans, its The free trial is a good way to experience the workflow and hear how your track responds to different mastering styles for artists exploring the mastering process. The platform’s clean interface and responsive AI engine make it one of the best options for high-quality free mastering.

    4. eMastered

    Developed by Grammy-winning engineers, eMastered combines AI algorithms with professional-grade audio enhancements. Its free mastering trial allows users to test the platform’s powerful processing before upgrading.

    eMastered’s intuitive workflow and sonic accuracy make it an excellent choice for artists seeking polished, a clear preview of how your track can sound after mastering, giving you a taste of its processing quality. Its mastering engine focuses on balance, clarity, and punch—key elements for competitive streaming quality.

    5. MajorDecibel

    MajorDecibel is a lesser-known but highly effective free online mastering tool. It provides instant feedback and allows users to compare their mastered track with the original. With genre-based templates and real-time adjustment options, it’s ideal for DIY musicians.

    MajorDecibel’s web-based platform requires no installation, making it convenient for artists who want a quick and accessible mastering solution.

    Tips for Getting the Best Results from Free Online Mastering

    While these tools simplify the mastering process, there are still best practices to follow for optimal sound quality.

    Prepare a Clean Mix

    Before uploading your track for mastering, ensure that your mix is well-balanced and free of clipping. The cleaner your mix, the better the mastering algorithm can process your audio.

    Focus on EQ balance, vocal clarity, and proper compression during mixing. A well-prepared track makes online mastering more effective and accurate.

    Choose the Right Preset for Your Genre

    Most mastering platforms offer genre-based presets—pop, hip-hop, rock, or electronic. Selecting the right one ensures your track maintains its intended tone and energy.

    Experiment with different presets until you find the one that best complements your sound. Use A/B comparisons to confirm that the mastering enhances your track without losing its original character.

    Compare Across Devices

    After mastering your track, play it through various playback systems. Each device highlights different frequency ranges, helping you identify any imbalances.

    Testing across devices ensures your mastered track maintains consistency and impact everywhere—from mobile speakers to studio monitors.

    Keep Dynamics Natural

    Avoid over-compression, which can make your track sound flat or lifeless. The goal of mastering is to enhance, not squash, your sound. Maintain dynamic range to preserve the emotional impact of your music.

    A good online mastering tool provides gentle compression and limiting, keeping your mix vibrant while meeting streaming standards.

    Why Choose A3Tunes for Distribution After Mastering

    Once your tracks are mastered and ready, A3Tunes ensures they reach audiences across major streaming platforms, including Spotify, Apple Music, and YouTube Music. A3Tunes handles your music delivery, metadata, and royalty reporting with care, ensuring your mastered tracks reach streaming platforms smoothly.

    By pairing free online mastering tools with A3Tunes’ professional distribution services, you create a seamless path from production to global release. The result is music that not only sounds professional but also reaches listeners worldwide. 

    Conclusion

    In the modern music industry, high-quality sound is no longer reserved for big-budget studios. With free online mastering, artists can achieve professional-grade results instantly and affordably. By combining smart technology with creativity, you can refine your sound and deliver music that competes on a global scale.

    Once your mastered tracks are ready, partner with A3Tunes to distribute them efficiently across streaming platforms. From creation to release, A3Tunes ensures every artist has the tools to produce, master, and share their music professionally.

    With the right mastering approach, your music doesn’t just sound better—it stands out. Start mastering your tracks today and unlock the true potential of your sound.

  • Spotify: Create and Manage Your Spotify Artist Account

    Spotify: Create and Manage Your Spotify Artist Account

    Introduction

    The rise of digital streaming has completely transformed the way artists share their music, and Spotify sits at the heart of this revolution. With millions of active listeners worldwide, knowing how to create and manage your Spotify artist account is essential for every musician seeking growth and global recognition. This account gives you access to analytics, promotional tools, and fan engagement features designed to help you succeed. Whether you’re an emerging artist or an established name, Spotify gives artists a strong set of tools to understand their audience and manage their presence effectively.

    In this detailed guide, we’ll walk you through how to create and manage your Spotify artist account step by step. You’ll learn about account setup, verification, analytics tools, playlist submissions, and how A3Tunes can help distribute your music to Spotify efficiently. By the end, you’ll know exactly how to make your Spotify presence professional, impactful, and primed for growth.

    Things to Know Before Creating a Spotify Artist Account

    Before diving into the technical setup, it’s vital to understand what makes the Spotify artist account different from a regular listener account. This section will help you get familiar with the essentials and prepare for a successful start.

    Understanding the Spotify for Artists Platform

    Spotify for Artists is the dedicated platform where musicians manage their profiles, track performance, and access marketing tools. Once you log in through your Spotify artist account, you’ll find an intuitive dashboard displaying your most important streaming metrics—listener demographics, top songs, playlist activity, and how listeners discover your songs.

    This platform serves as your music career’s control center. It’s not just about numbers; it’s about understanding your audience and making informed decisions that drive your success. By studying your data and optimizing your strategy, you can use Spotify for Artists to strengthen your brand presence.

    Why Verification Matters on Spotify

    Getting your Spotify artist account verified adds a layer of authenticity and professionalism to your profile. Verified artists get a blue checkmark and access to exclusive tools like playlist submissions, advanced analytics, and profile customization options. This badge not only enhances your credibility but also Verification gives your profile a professional look and helps fans easily identify your official page.

    Verification also helps protect your identity and ensure that fans can easily distinguish your official profile from duplicates. Once verified, you can personalize your profile and make it a true representation of your artistry.

    The Role of Distribution in Account Setup

    Your music distribution partner plays a crucial role in setting up your Spotify artist account. Distributors like A3Tunes ensure your music is delivered correctly to Spotify with accurate metadata, cover art, and delivery requirements. Without proper distribution, your songs may not appear under your official profile or qualify for monetization.

    A3Tunes simplifies this process by managing all the technical aspects, ensuring that your music appears seamlessly on Spotify. Once your tracks are live, you can claim your artist profile, verify it, and start managing your presence with confidence.

    Navigating Spotify Artist Dashboard and Insights

    Once your Spotify artist account is active, you’ll gain access to detailed analytics about your listeners. These insights include geographic data, listener habits, and playlist sources. Understanding this data is essential for planning marketing campaigns and tour strategies.

    The dashboard updates in real time, allowing you to monitor performance as it happens. By consistently checking these analytics, you can identify trends, understand your audience better, and make data-driven creative choices.

    Spotify’s Artist Policies and Best Practices

    To ensure long-term success, every artist should follow Spotify’s community and content guidelines. These rules maintain the platform’s integrity and protect both creators and listeners. Avoid using misleading artwork or unauthorized samples, and always distribute through an authorized partner like A3Tunes.

    Following best practices also improves your chances of being featured on editorial playlists or recommended by Spotify’s algorithm. Consistency, quality, and compliance are key to building a sustainable artist profile.

    How to Create Your Spotify Artist Account

    Once you’re ready to go live, setting up your Spotify artist account is straightforward. Here’s how you can get started quickly and correctly.

    Step 1: Release Music Through a Distributor

    Before you can claim your Spotify artist account, your music must be distributed to Spotify through an authorized distributor like A3Tunes. This ensures your songs are properly uploaded with the correct metadata, cover art, and rights.

    A3Tunes handles this process from start to finish, ensuring your tracks are delivered to Spotify and other major streaming services seamlessly. Once your release is live, Spotify automatically generates a basic artist profile linked to your music.

    Step 2: Claim Your Artist Profile

    To claim your artist profile, visit the Spotify for Artists website and click “Claim Your Profile.” You’ll need to log in using your preferred method—email, Google, or Apple ID—and search for your artist name. Spotify will guide you through a quick verification process that confirms your identity and ownership of the music.

    Once approved, you’ll gain full access to the Spotify for Artists dashboard. From there, you can personalize your profile, track analytics, and manage your releases.

    Step 3: Customize Your Artist Profile

    After logging in, take time to customize your Spotify artist profile to reflect your brand identity. Add a professional photo, write a compelling bio, and feature your top songs or playlists. Spotify also allows you to pin upcoming shows, merchandise links, and announcements directly on your page.

    Your profile is the first impression new listeners get, so make sure it looks polished and engaging. Regular updates help maintain a strong connection with your audience and keep your page active in Spotify’s algorithms.

    Step 4: Submit Your Music to Playlists

    Once your Spotify artist account is verified, you can submit unreleased songs directly to Spotify’s editorial and algorithmic playlists. Getting featured on a playlist can help your music reach new listeners when it aligns well with the playlist’s style and curation. Editors review each song carefully, and pitching helps them understand your music better.

    To improve your chances, craft detailed descriptions and provide context for your songs during submission. Regular playlist pitching also increases your visibility to Spotify curators and fans searching for new music.

    Step 5: Track and Analyze Performance

    With your Spotify artist account, you can monitor every aspect of your music’s performance. Check where your listeners are coming from, how they discover your songs, and which tracks perform best. These insights help you refine your strategy for future releases.

    Tracking performance also allows you to test different marketing approaches, such as social media campaigns or collaborations, and see what resonates most with your fans.

    Tips to Manage Your Spotify Artist Account Effectively

    After setting up your account, consistent management ensures long-term success. Here are some best practices to maximize your Spotify potential.

    Regularly Update Your Profile

    Keeping your Spotify artist profile updated with new photos, bios, and featured tracks shows fans that you’re active and evolving. Keeping your profile active helps you present a fresh and updated presence to listeners on their profiles.

    An up-to-date profile increases your chances of being discovered by new listeners. Make sure your visuals and tone align with your brand for a cohesive online identity.

    Engage with Fans through Spotify Tools

    Spotify provides tools like artist picks, concert listings, and fan-first notifications to keep your audience engaged. Use these features to promote releases, upcoming tours, or special announcements directly to your listeners.

    Engaging consistently helps build stronger fan loyalty and boosts streaming numbers. Your Spotify artist account should serve as an extension of your overall marketing strategy.

    Why Choose A3Tunes for Your Spotify Distribution

    Choosing A3Tunes supports your Spotify journey with reliable distribution and helpful artist resources. A3Tunes specializes in delivering high-quality distribution, accurate reporting, and artist support tailored to independent creators.

    With A3Tunes, you gain full control over your releases and royalties, plus access to valuable resources for marketing and promotion. Their expertise ensures your releases reach Spotify accurately, while you manage your artist profile through Spotify for Artists.

    Conclusion

    Creating and managing your Spotify artist account is more than just a technical step—it’s your gateway to building a lasting career in the digital music industry. From setting up your account to leveraging analytics, playlists, and fan engagement tools, Spotify gives you the power to control your artistic presence.

    By partnering with A3Tunes, you can simplify distribution, enhance visibility, and focus on what truly matters—making great music. Start your Spotify journey today and let every stream bring you closer to your audience and your goals.